 |
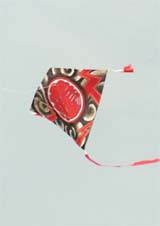 |
Japanese kites are among the most widely appealing Japanese
traditional craft Products and Japan possesses a wide variety
of kites with each geographical region having developed its
own unique shapes and printed designs.
Let's make a traditional kite. You can successfully make it,decorate it,fly it
on the same day. |
|
 Materials Materials |
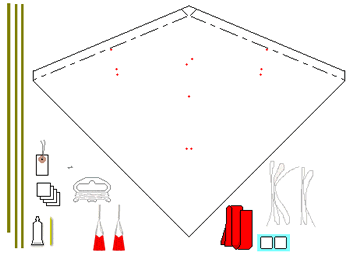 |
| Check the contents: |
| Japanese paper(Washi) |
1pc. |
| Center spar(bamboo) 5 x 2.5 x 590L |
1pc. |
| Cross spar(bamboo) 4 x 2.2 x 625L |
2pcs. |
| Paper tape(square) |
4pcs. |
| Tassel |
2pcs. |
| String 1.8m long |
2pcs. |
| String 75cm long |
2pcs. |
| Z shaped hook |
1pc. |
| Glue,Toothpick,Tag |
1each |
| Flying line |
1pc. |
|
|
| How
to make a Hishi Kite. |
|
|
 |
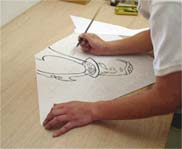
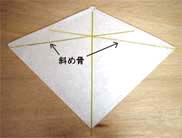
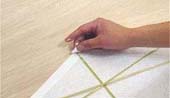
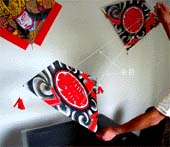
Decorate the paper.
Decorate the paper front with whatever design you like.
The paper front is slightly smooth. |
Fold the leading edge.
Make sure the paper is dry. Turn the paper over.
Fold a dotted line inward. |
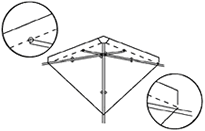
Attach the center spar.
Attach the spar to the paper
with glue. (Do not attach the bark side of the bamboo.) |
|
| The taped end of cross spar should be side to attach
tassel. |
|
 |
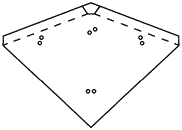
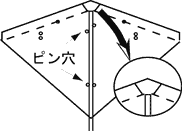
Position the center spar.
The pin holes are a guide when you lay the spar down. |
Attach the cross spars.
Attach the spars to the paper with glue.(Do not attach the bark side of the bamboo.) |
Position the cross spars.
The pin hoples are a guide as shown above. |
|
 |
 |
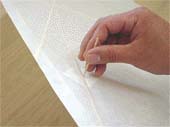
Stick the paper tapes.
Stick the paper tape at the three places where the pin holes exist and also
at the bottom corner.
Dip the paper tape to water when sticking. |
Glue
Glue the folded leading edge. |
Glue the top corner
Glue the folded top corner. |
|
 |
|
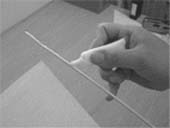
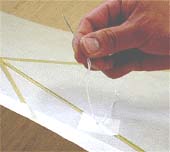
Attach 75cm string.
Punch 2 holes on the paper front with a toothpick. |
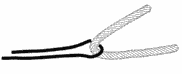
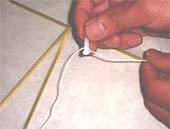
Substitute for needle.
Take off wire from the tag and
use the wire. |
From the kite back,
put string
through each hole and around spar. |
|
|

|
|
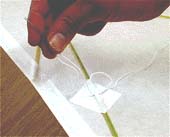
Secure with knot leaving
about 5cm.
It is recommendable to secure the knot with a drop of glue for safety. |
The string is slack when it
was attached at both points. |
|

|
 |
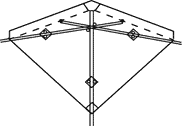
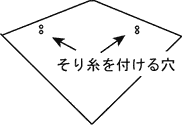
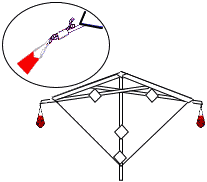
Bridling kite.
For high-flying success, the kite must have a correctly sewn and tied bridle. |
The bridle point
A right positioned bridle is a key of well flying. |
Attach the bridle.
Punch holes on the paper front
with a toothpick. Take the same way as the attachment of 75cm string. |
|
|
|
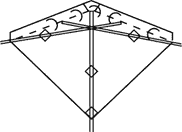
Attach the bridle.
Attach a 180cm length of string at the bridle top and the bridle bottom , shown
as above. |
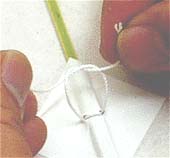
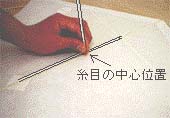
Find a proper pivot point.
Find a hole 9 cm below from the bridle top. This hole is the pivot point. Hold the
bridle at the pivot point and pull it upward. |
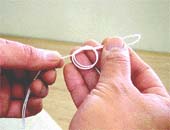
Make a loop at the top of the pulled bridle and secure with knot. Attach flying line to
bridle loop. |
|
|
|
Attach tassels.
Attach tassel to each end of cross spar with scotch tape. |
Attach a Z shaped hook at around center of the bow line. |
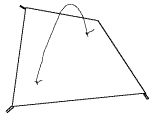
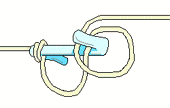
Make the spar bend.
Pull the thread tight and make the spar bend slightly. Tie the bow line to the hook.
|

|

|
|
Form the bow.
The bow should be 5cm at its maximum point. |
|
|
|
 |
|


